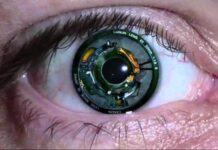
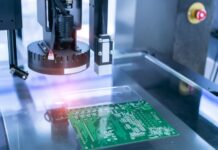
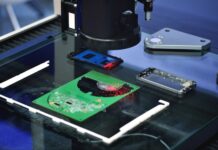
Machine vision is a technology that automatically extracts information from digital images for process or quality control. Since it is better suited to repetitive inspection tasks, most manufacturers today use automated machine vision instead of human inspectors.
Machine vision can inspect hundreds and thousands of parts per minute, providing more reliable and consistent inspection results twenty-four hours a day, seven days a week. It is faster, objective, and works continuously.
The most common machine vision applications in manufacturing today are measurement, counting, location, and decoding. Manufacturers can save money and increase profitability by reducing defects, increasing yield, facilitating compliance with regulations, and tracking parts with machine vision.
To acquire images, machine vision systems use digital sensors protected inside industrial cameras with specialized optics. For decision-making, computer hardware and software can process, analyze, and measure a variety of characteristics.
Lighting, lens, image sensor, vision processing, and communications are the main components of a machine vision system. The part to be inspected is illuminated, allowing its features to stand out and be clearly seen by the camera. The image is captured by the lens and presented to the sensor as light. This light is converted into a digital image by the sensor in a machine vision camera, then sent to the processor for analysis.
Vision processing consists of algorithms that review the image, extract required information, run the necessary inspection, and decide. Finally, communication is usually accomplished by sending discrete I/O signals or data over a serial connection to a logging device or using the information.
Machine vision helps meet strategic goals
- Higher quality – Inspection, measurement, gauging, and assembly verification
- Increased productivity – Repetitive tasks formerly done manually are now done by Machine Vision System
- Production flexibility – Measurement and gauging / Robot guidance / Prior operation verification
- Less machine downtime and reduced setup time – Changeovers programmed in advance
- More complete information and tighter process control – Manual tasks can now provide computer data feedback
- Lower capital equipment costs – Adding vision to a machine improves its performance, avoids obsolescence
- Lower production costs – One vision system vs. many people / Detection of flaws early in the process
- Scrap rate reduction – Inspection, measurement, and gauging
- Inventory control – Optical Character Recognition and identification
- Reduced floor space – Vision system vs. operator
Machine vision systems are divided into three categories: 1D, 2D, and 3D.
1D vision systems
1D vision analyses a digital signal one line at a time instead of looking at a whole picture at once. It can provide 100% continuous web inspection and classification, using line-scan cameras on materials such as paper, plastics, metals, and other non-woven sheet or roll goods. This technique commonly detects and classifies defects on materials manufactured in a continuous process.
Four reasons to use line scan:
- Unwrap cylindrical objects for inspection
- Add vision to space-constrained environments
- Meet high-resolution inspection requirements
- Inspect objects in continuous motion
2D vision systems
2D vision systems use digital cameras to capture the image of an object. With 2D machine vision, a two-dimensional map (X, Y) of reflected intensity is captured and processed. The 2D image, however, does not provide any height information. Processing typically consists of comparing variations in intensity (contrast).
2D vision systems are extensively used throughout the industrial automation industry in a wide range of tasks, including verification of features and position, dimension checking, barcode reading, character recognition, label verification, quality inspection, surveillance, and object tracking, and presence detection.
Positioning, inspection, measuring, and reading are all tasks that 2D vision is used to solve. This technology is especially useful in high-contrast applications or when an object’s texture or color is critical to the solution. Typical limitations of 2D machine vision technology include; parallax, depth of focus, ambient light, and contrast variations.
3D vision systems
3D machine vision systems usually comprise multiple cameras or laser displacement sensors mounted at different locations in “triangulation” with an object in a 3D space. They create a highly accurate three-dimensional digitized model of a target object by providing X, Y, and Z data along with respective rotational information (around each of the axes). Regardless of the production line’s environmental conditions, they can determine a target object’s precise location in space, volume, surface angles, degrees of flatness, and features.
3D vision systems are used for a broad spectrum of tasks, including the measurement of thickness, height, and volume, measuring shapes, holes, angles, and curves, dimensioning and space management, detection of surface or assembly defects, quality control, verification against 3D CAD models, bin picking for placing, packing or assembly, object scanning and digitization, and robot guidance and surface tracking (e.g., for welding, gluing, deburring, and more).


